Adding and Editing Tags
In Graystack:One, you can add and edit tags to efficiently organize your articles. This guide shows you how to create new tags and adjust existing ones.
What You Will Learn
Create a new tag
Edit an existing tag
Customize tags with colors and translations
Set notification settings for tags
Create a New Tag
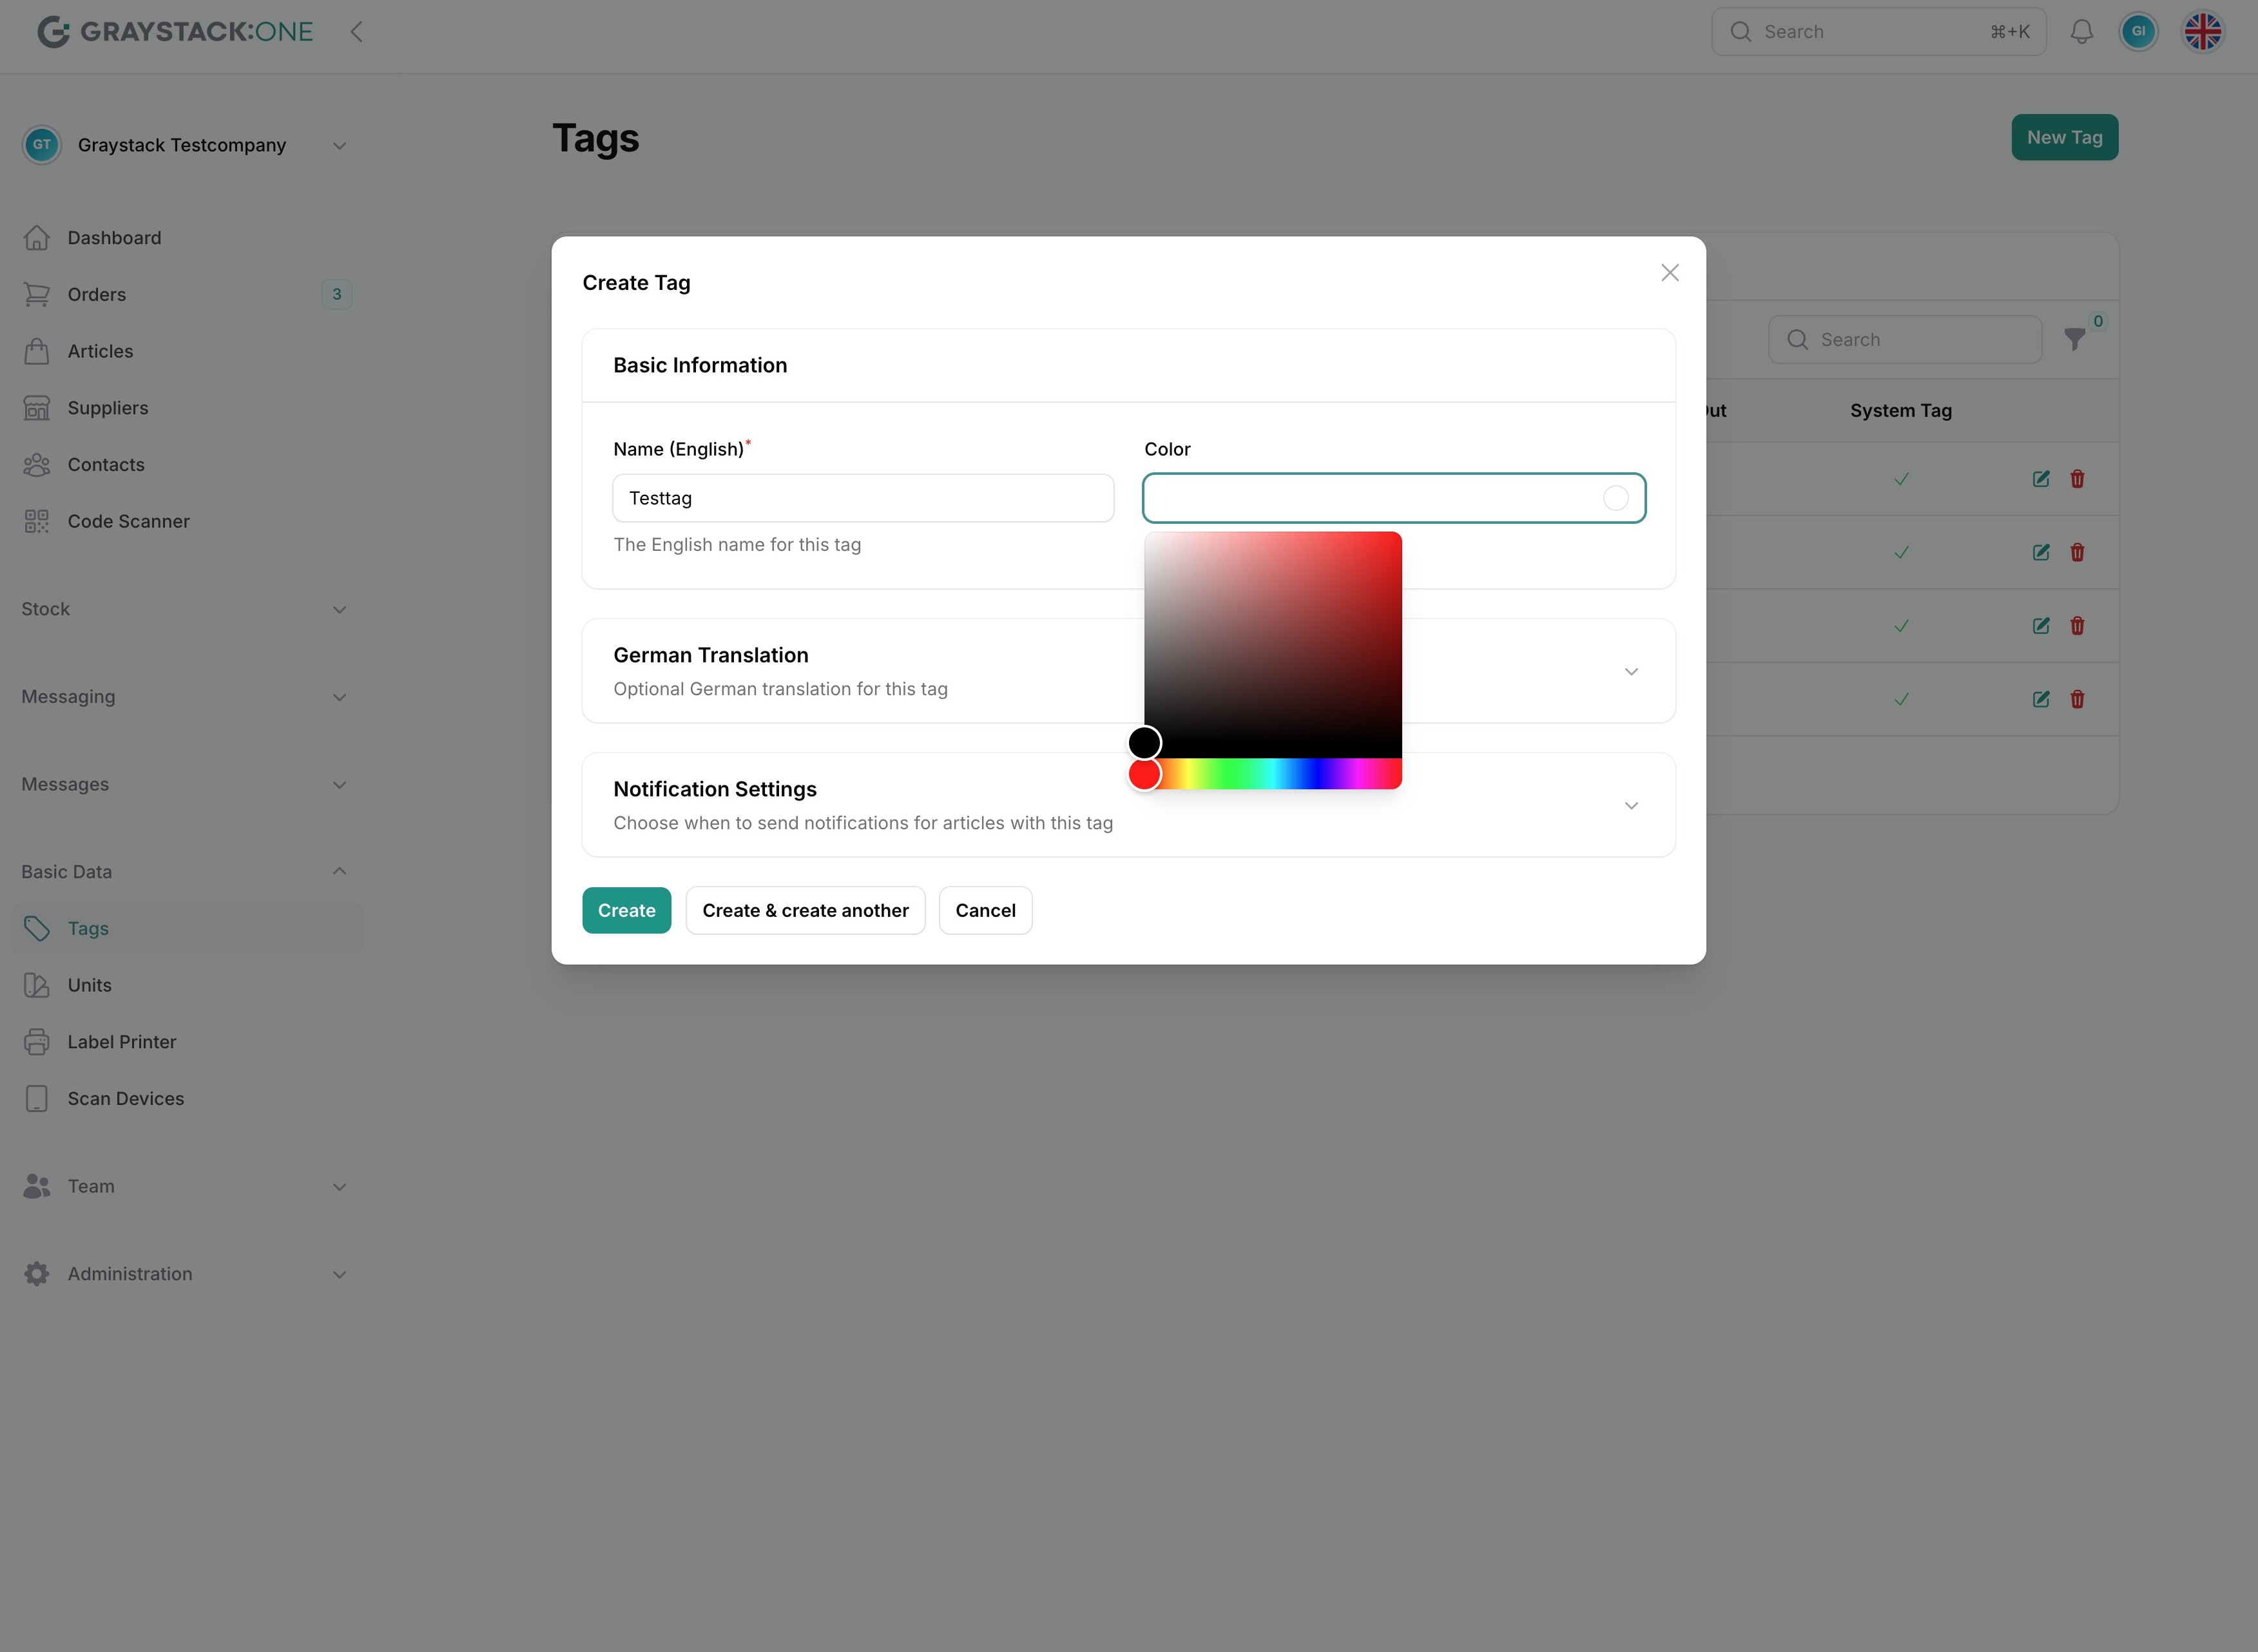
To create a new tag, navigate to the 'Tags' section in the menu. Click on the 'New Tag' button to open the creation window.
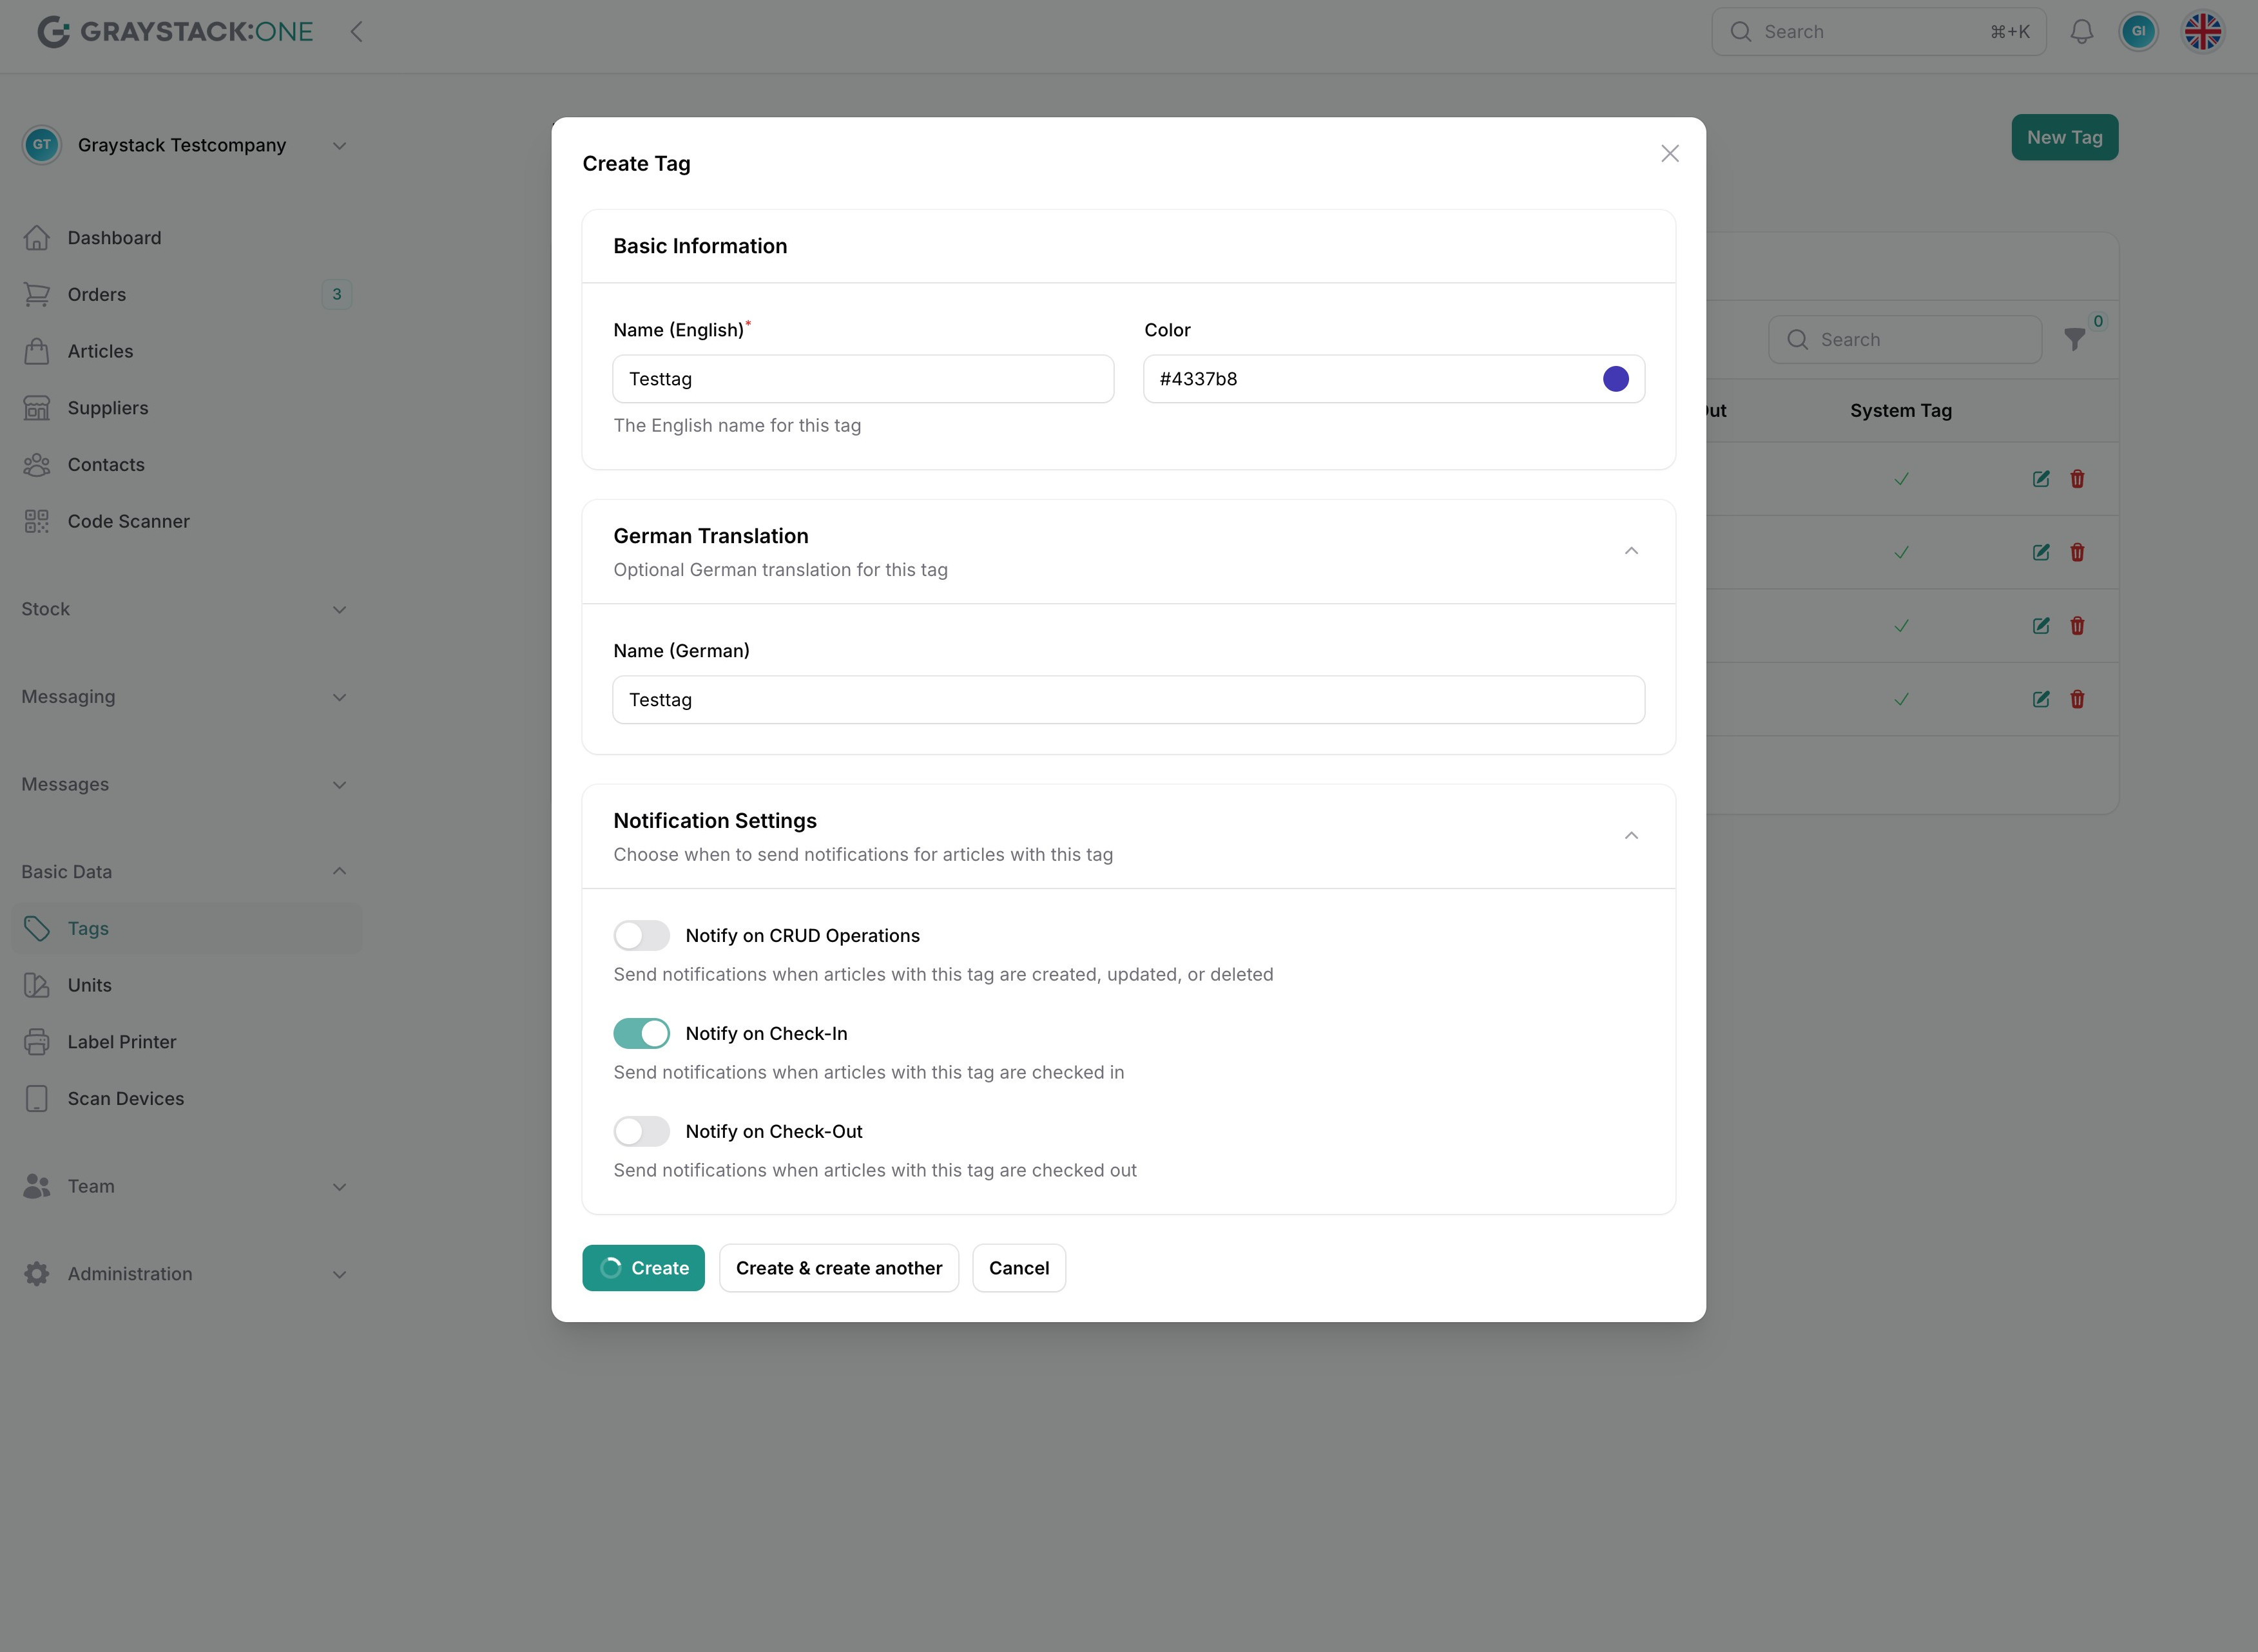
In the creation window, enter the name of the tag and select a color. Optionally, you can add a German translation.
With the notification settings, you can specify whether notifications should be triggered by certain events for articles tagged with this tag:
CRUD Operations:
These are notifications for creating, updating, or deleting an article
Checkin:
Notification when checking in an article
Checkout:
Notification when checking out an article
Note: Users will only receive notifications if they have also enabled them in their personal settings!
Click on 'Create' to save the tag or 'Create & create another' to add another tag.
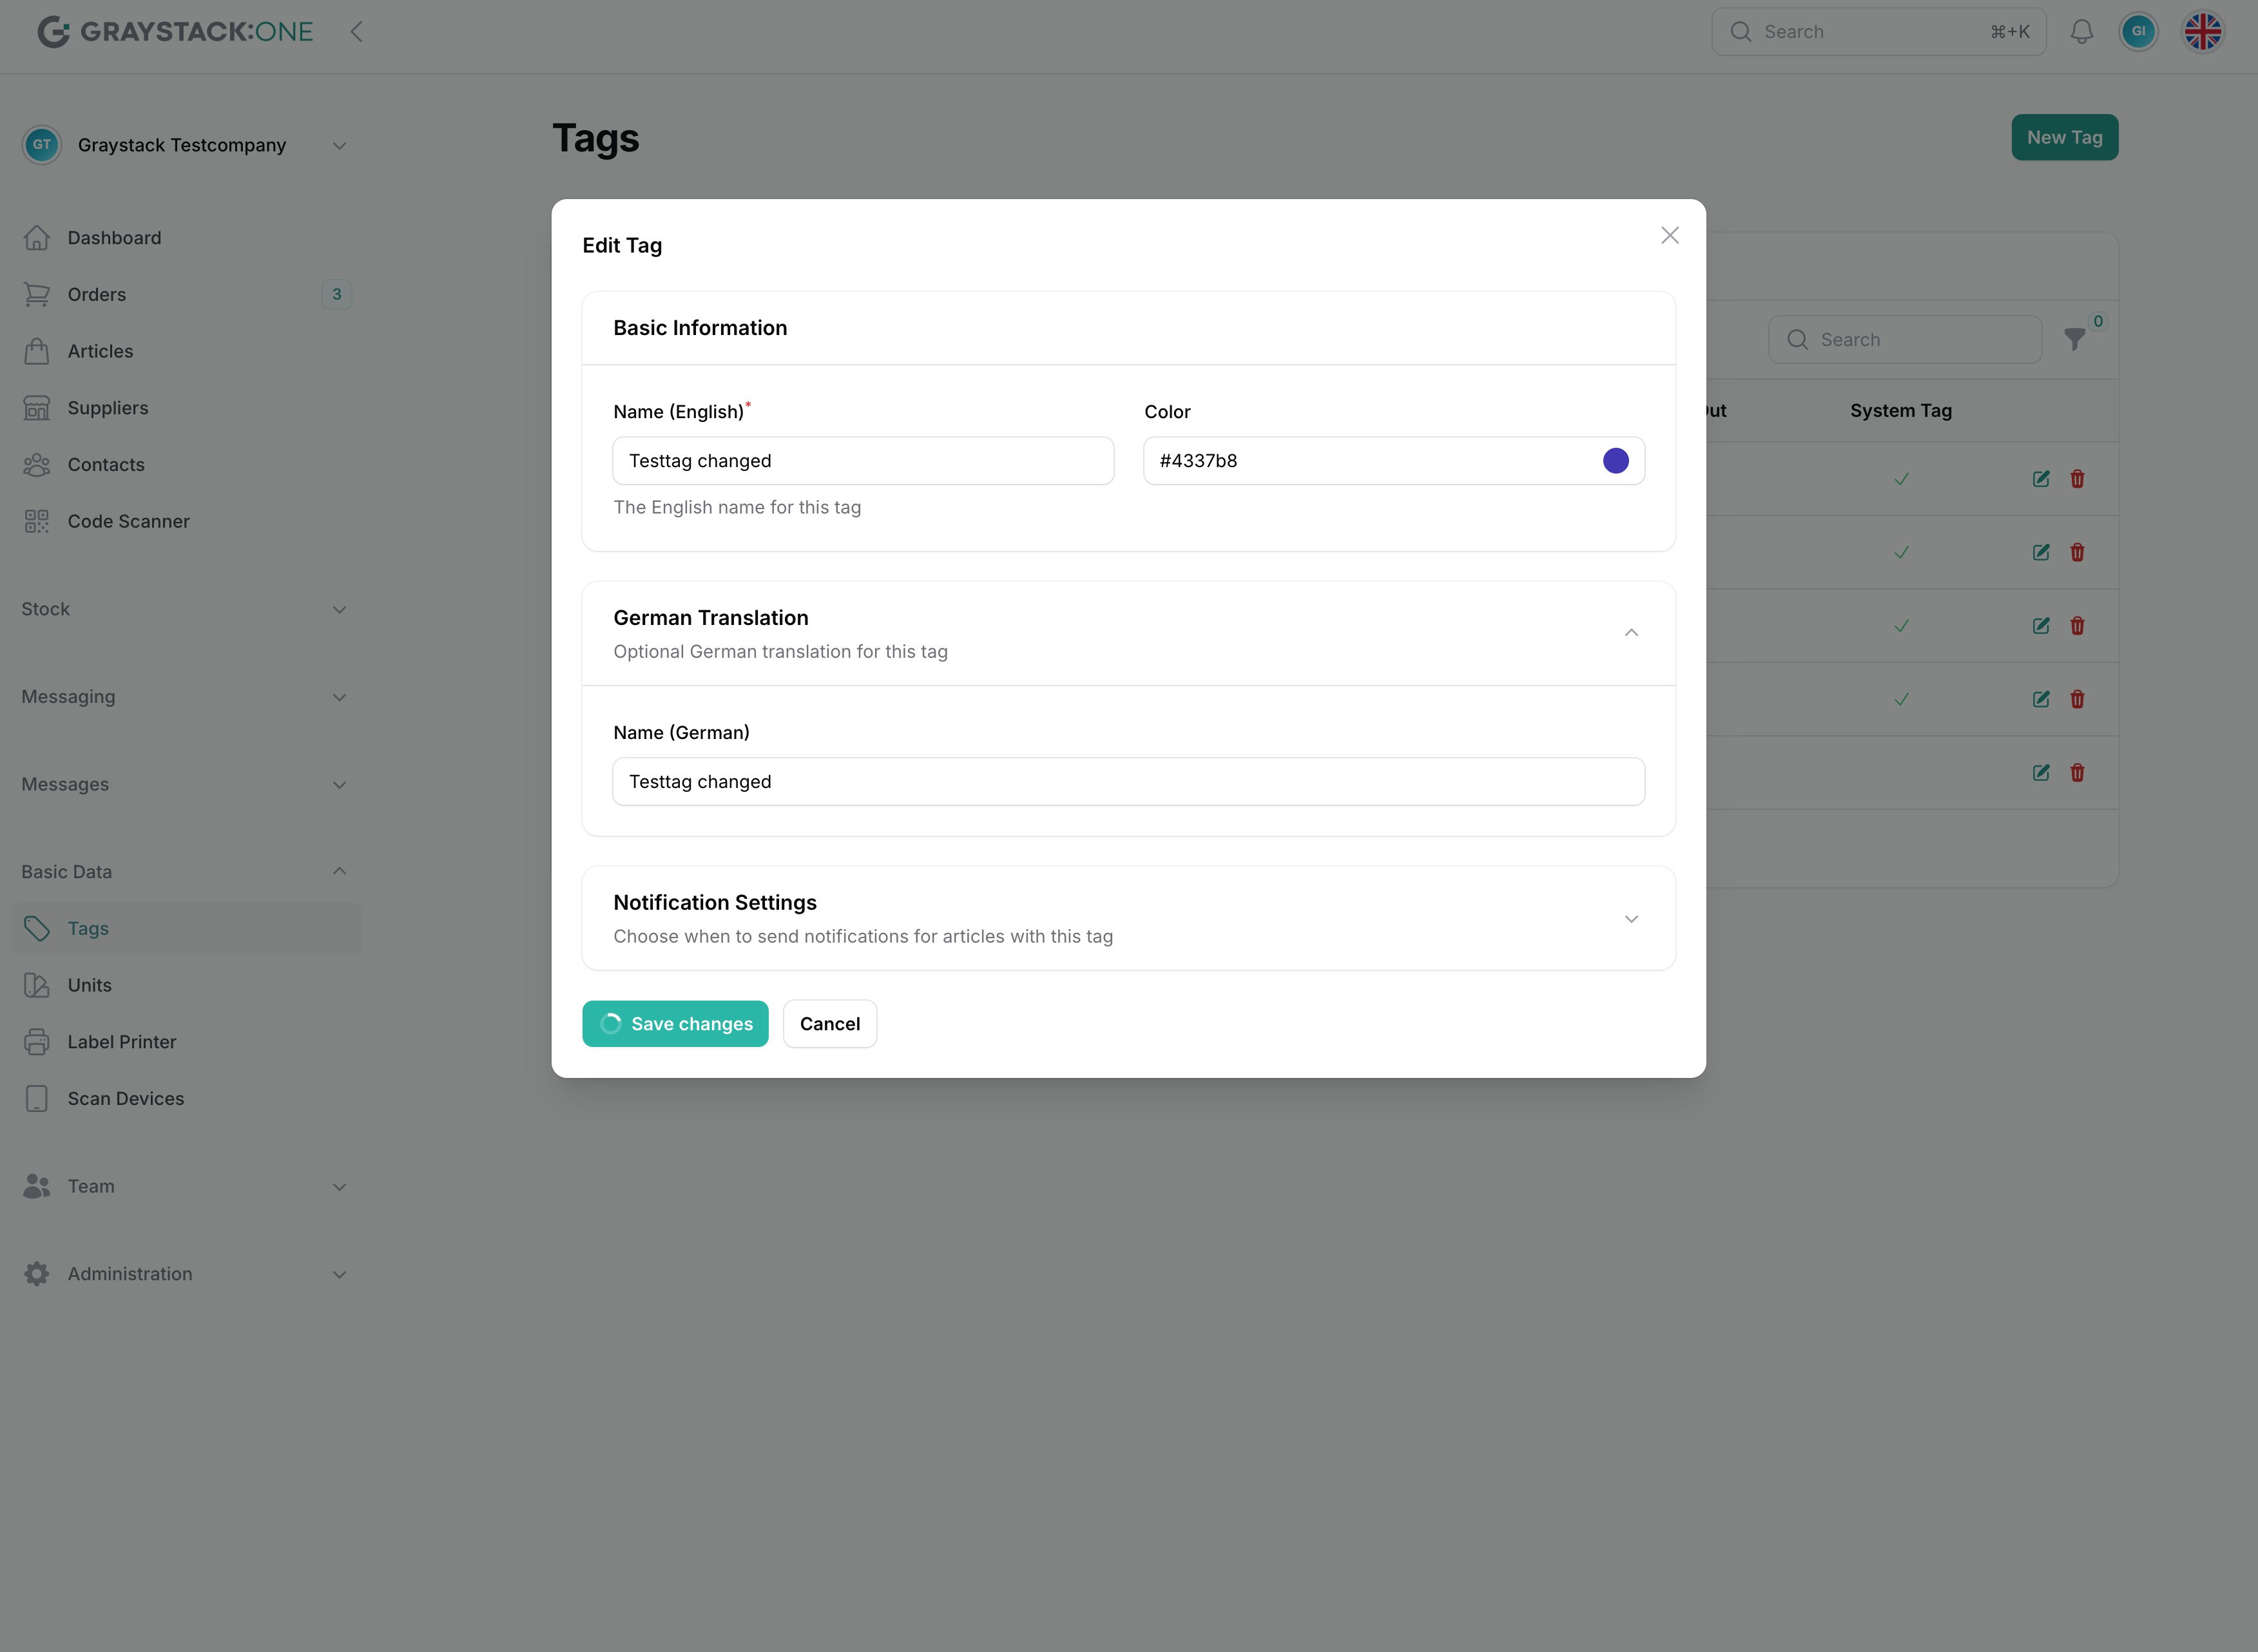
Edit an Existing Tag
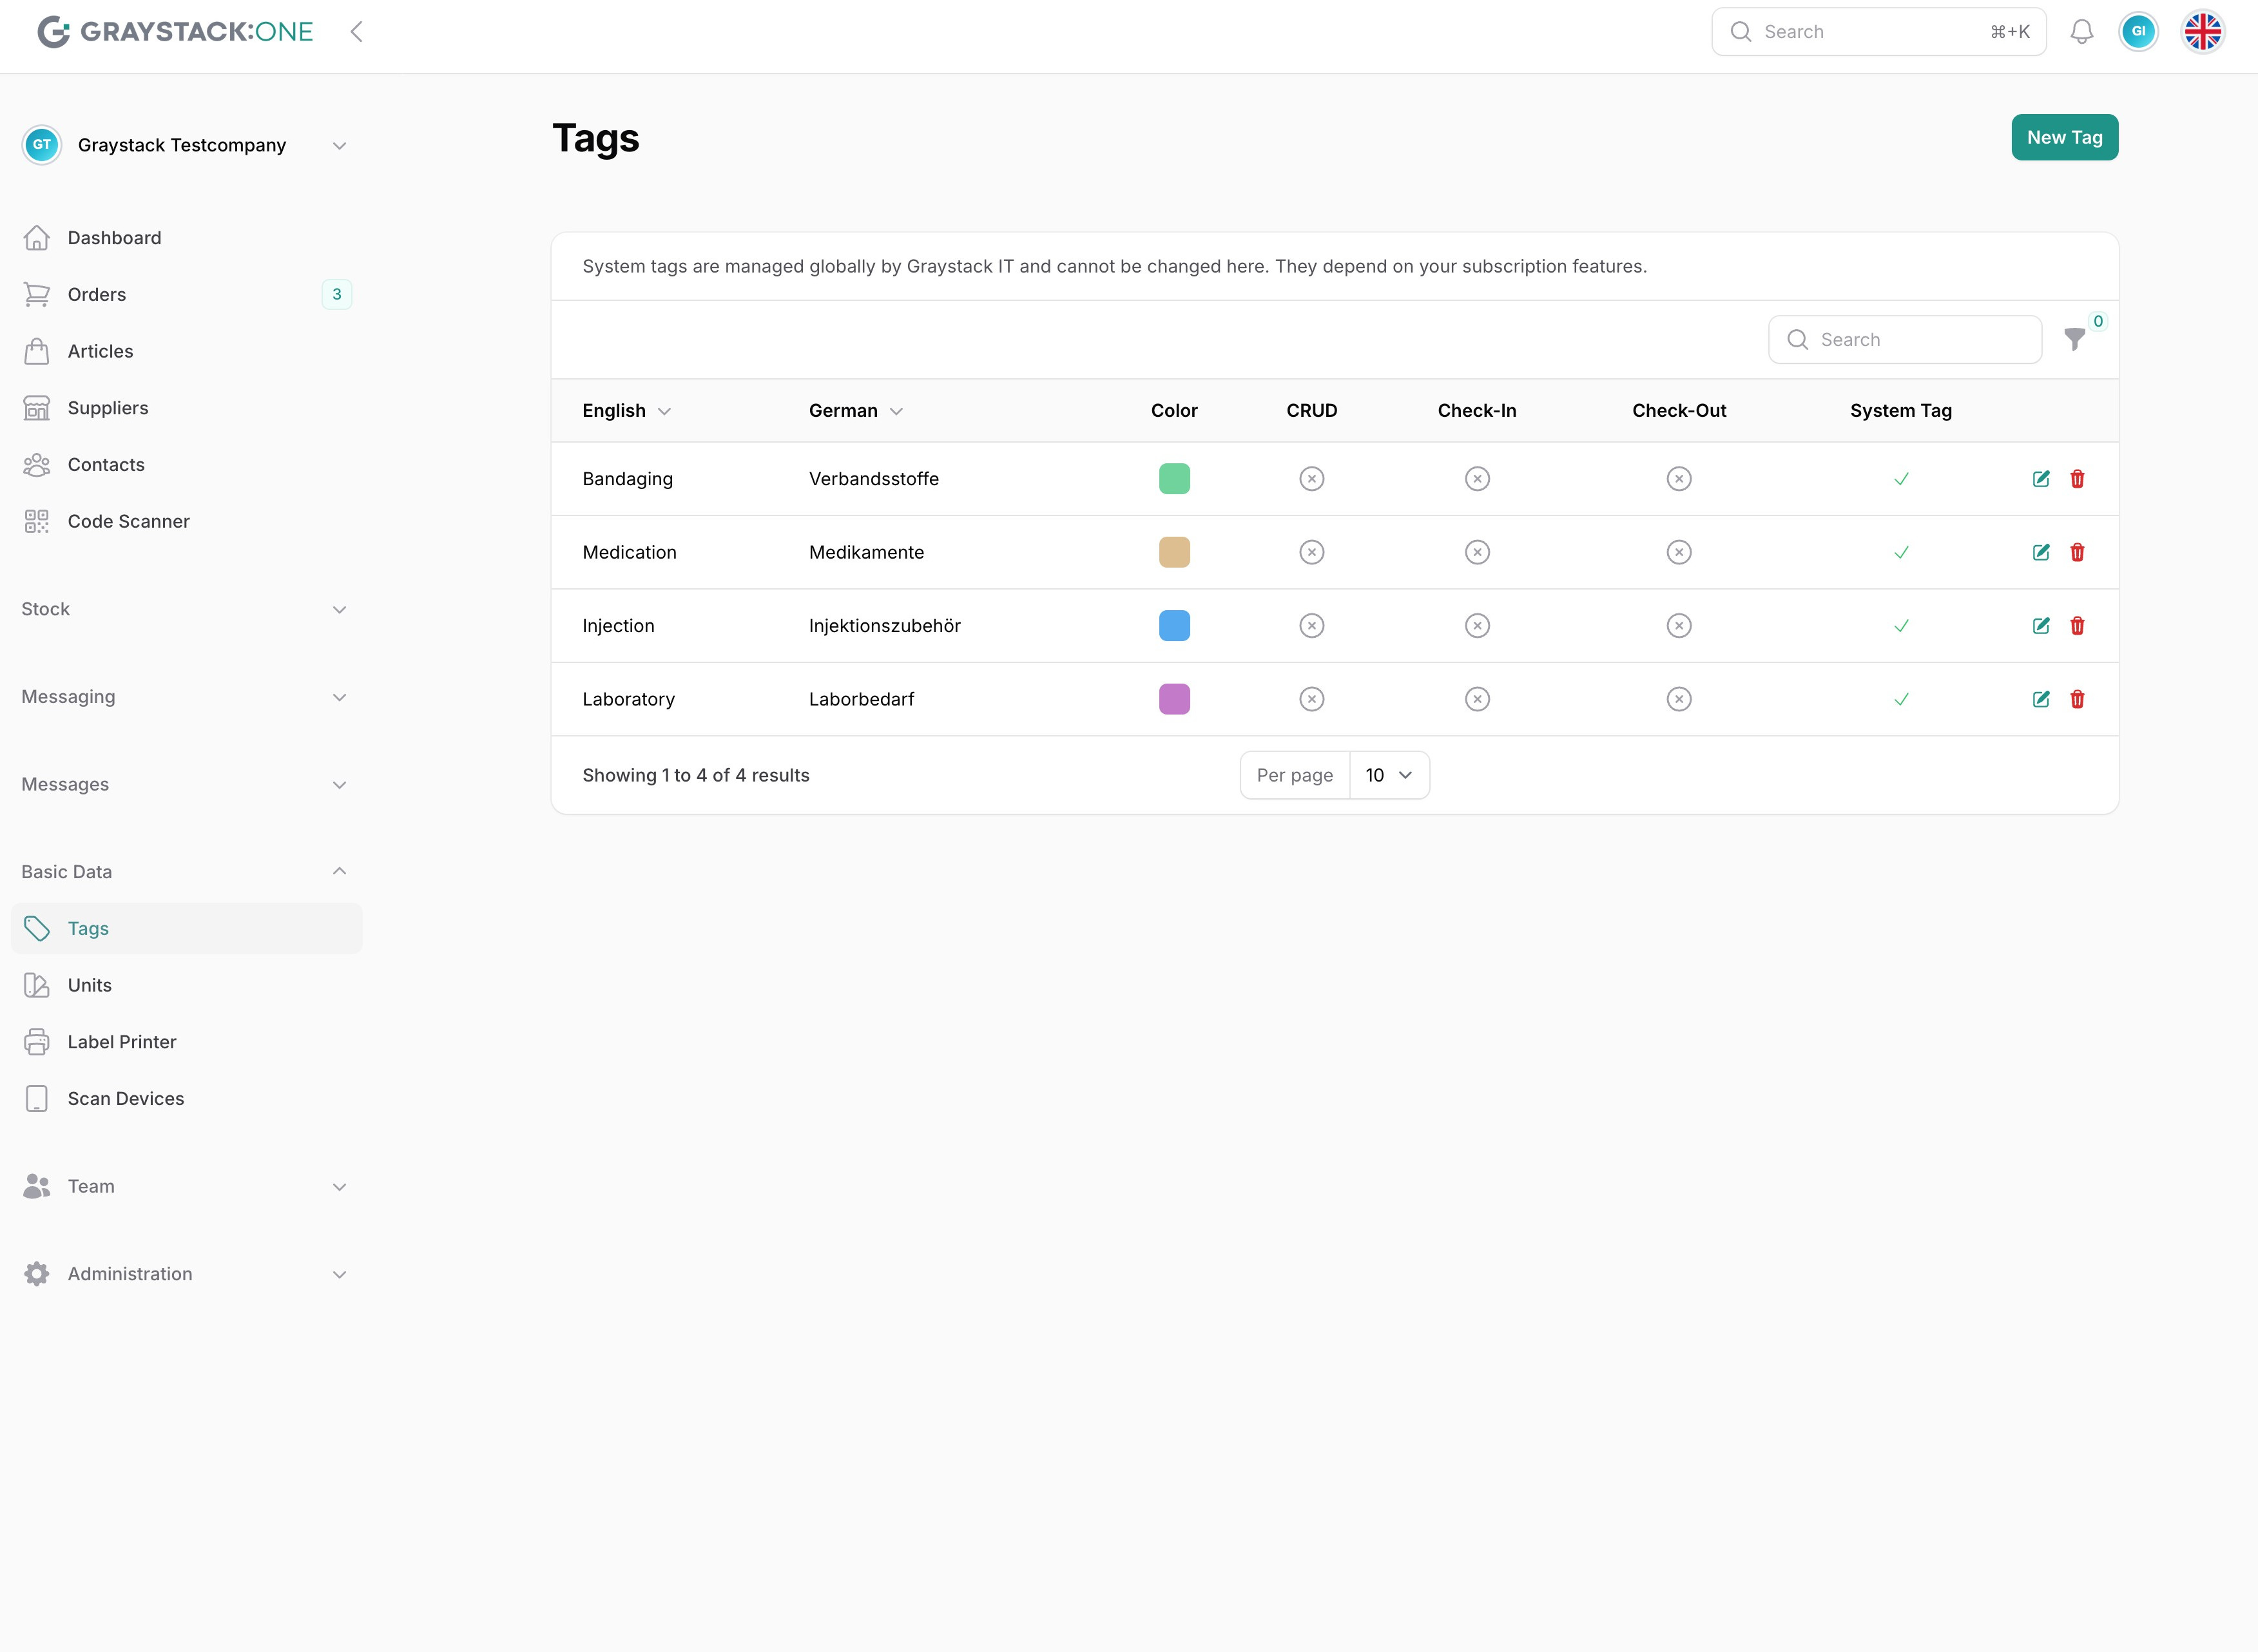
To edit an existing tag, click on the pencil icon next to the tag you wish to change. This opens the editing window.
Please note: System tags cannot be edited! These are specified by Graystack:One and can be used for articles, but cannot be changed.
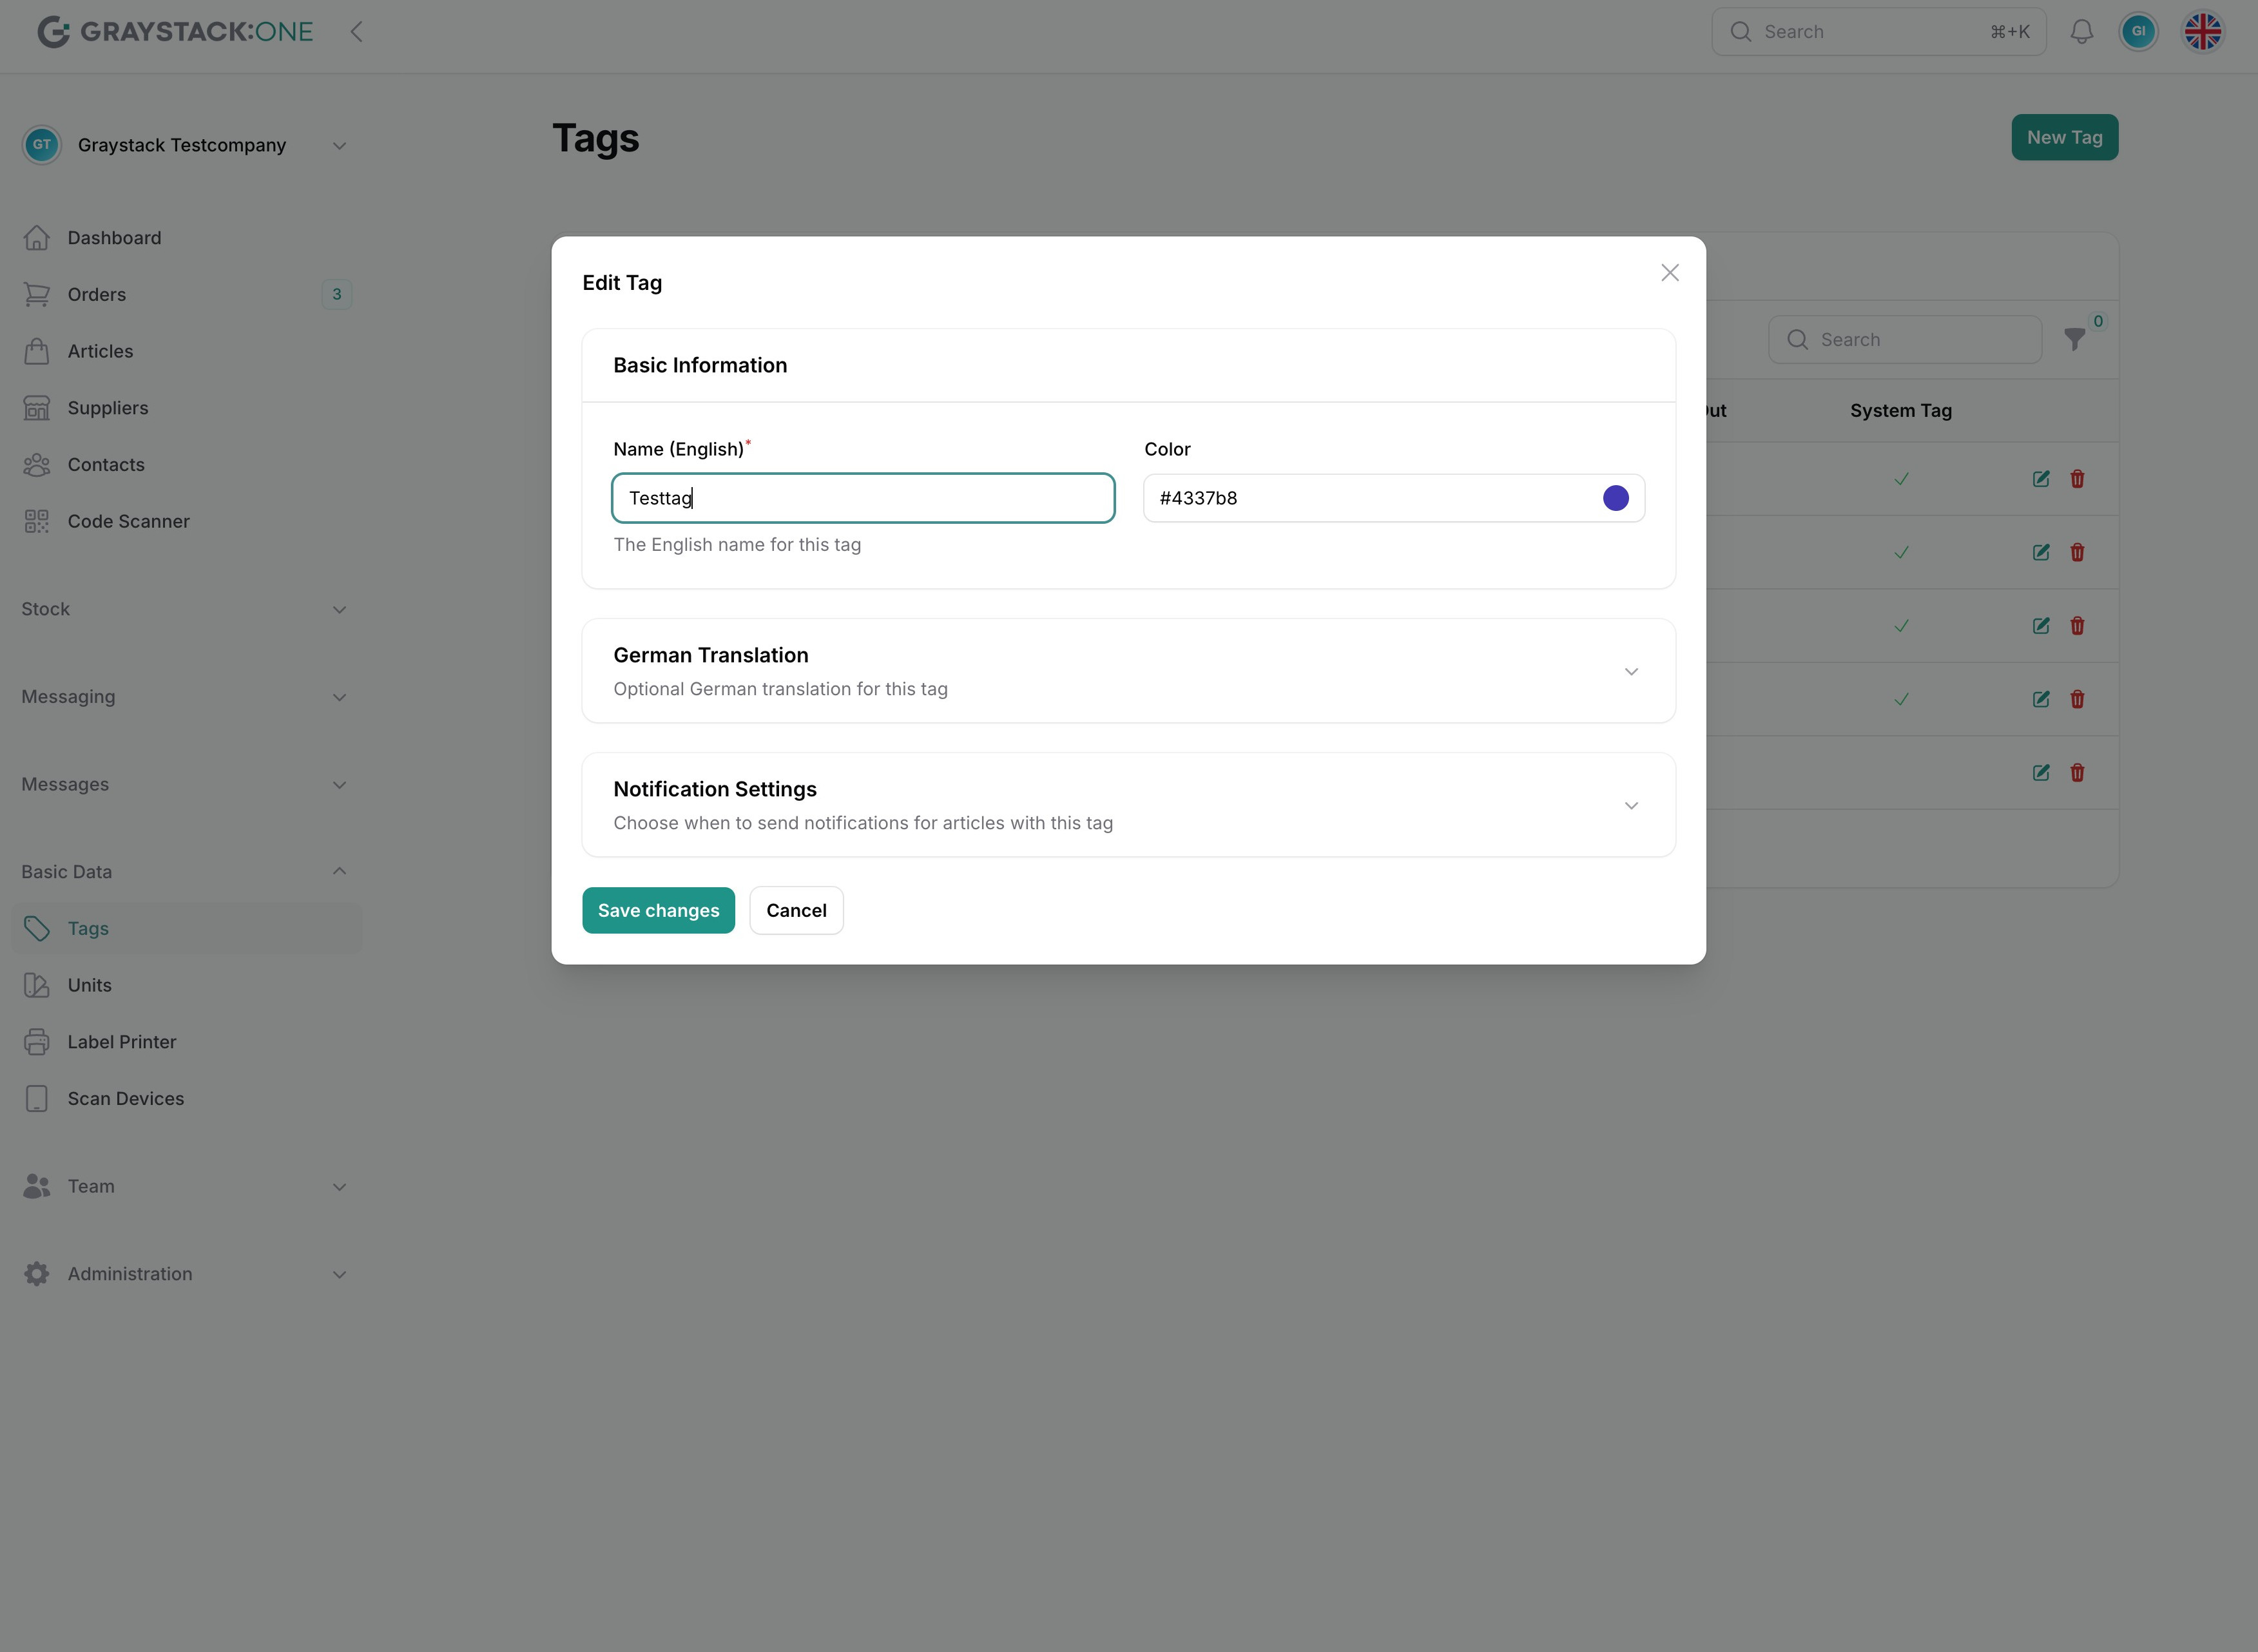
Change the desired information such as name, color, or translations. You can also adjust the notification settings.

Click on 'Save changes' to save the modifications.